- Important
- If using total import, any users listed on the user management screen but not listed in the user data file will be deleted during the import process.
- User data exceeding the number of administrator users subtracted from the contracted number of users will not be imported.
- If many users are added at once, it may take some time for sign-in information to be sent via email. It is recommended to import 50 additional users at a time.
- The import function cannot be used to change only differences between upper case and lower case in email addresses.
For general users and group leaders, this can be changed using the procedure described in “Editing users.”
For administrator users, this can be changed using the procedure described in “Confirming or changing sign-in email addresses” in the User Manual.
1. Click [Import User].

- Note
- If the checkbox for an existing user is selected, [Import User] will not be displayed. Clear the checkbox first.
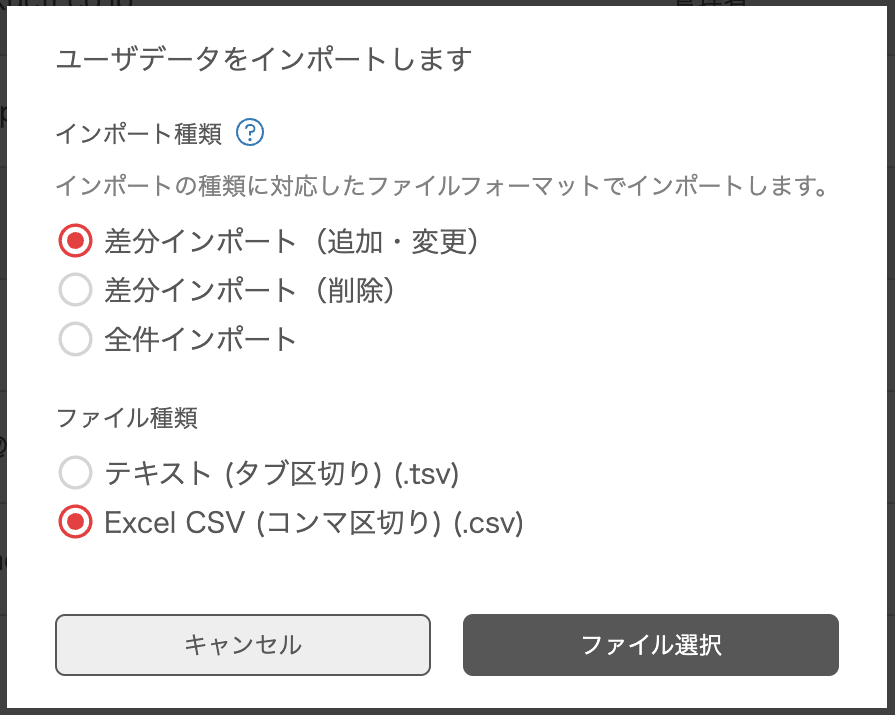
2. Specify the import and file types based on the contents of the user data file, and then click [Select File].
3. Specify the user data file.
4. Review the information for the users to delete, add, or change, and then click [Import User].
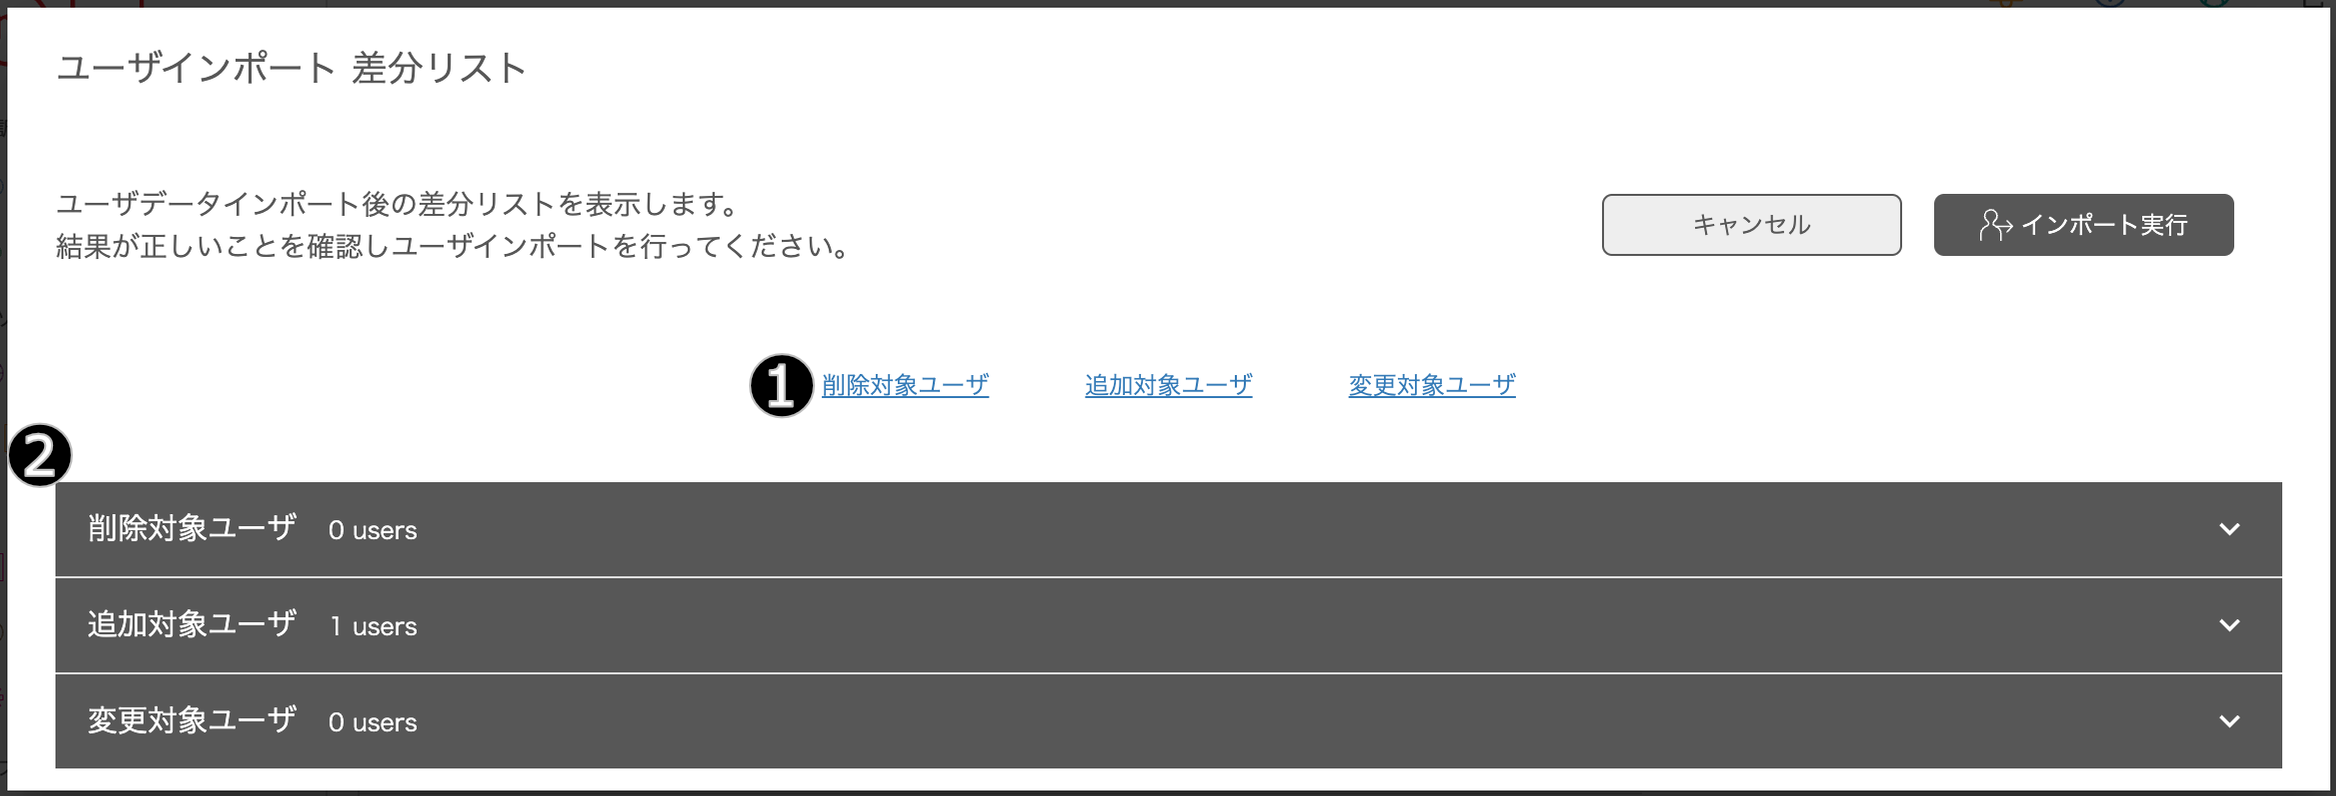
- Click (1) to scroll the screen to the list of applicable users. Click (2) to open or close the list of applicable users.
- Important
- To cancel an operation (for example, in order to select another file), click [Cancel] to close the [User Import Difference List] screen. If the page is reloaded without completing the [Cancel] operation, it may temporarily prevent the use of operations related to user data.
5. Click [OK].
6. Click [Close].
An email with sign-in information is sent to the email addresses of the users added during importing.